Skip to content

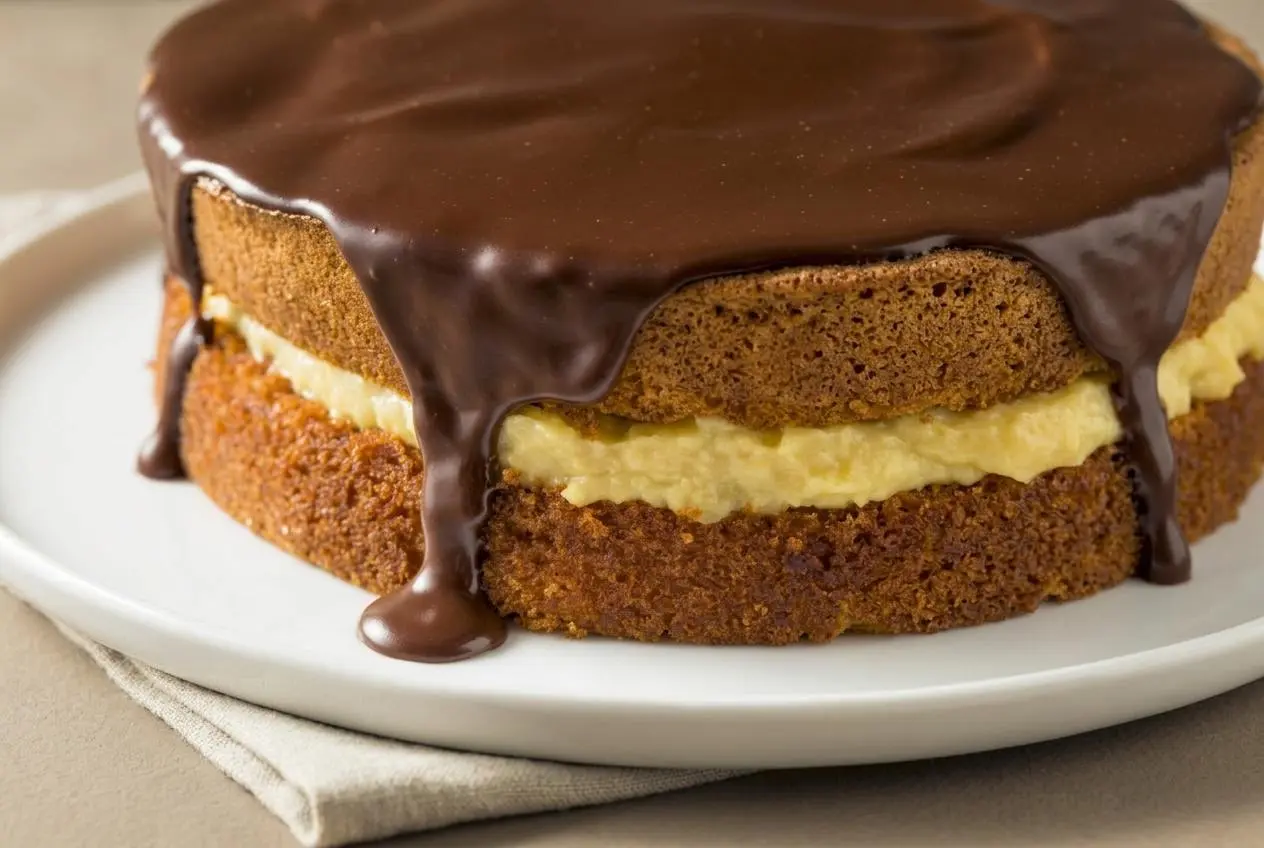
This keto boston cream pie layers moist almond and coconut flour cake with silky baked-and-blended custard and glossy chocolate ganache. Chill the filled cake before glazing so the custard firms up and the layers stay in place.
Despite its name, this dessert is a layer cake, complete with a creamy center and chocolate top. The grain-free sponge gives the filling a tender foundation without a traditional wheat flour batter.
The custard skips stovetop tempering: bake it, cool it, then blend it smooth. Each component is manageable when you leave room for cooling. The blender does the silky part.
Before unmolding the cake, check the underside of the pan: it should feel completely room temperature.
Essential Ingredients
The flours balance tenderness and moisture, eggs build structure, and butter adds richness. Cream gives the custard body and softens the chocolate topping, while sweeteners, salt, and vanilla round out the flavor.
- For The Cake (see notes for mix alternatives)
- 1.5 cups Almond Flour
- 1/4 cup Coconut Flour
- 3 tsp. Baking Powder
- 1/4 tsp. Sea Salt
- 1.5 sticks (3/4 cup) butter, melted
- 4 Eggs
- 2 Egg Whites
- 1/2 cup Almond Milk OR Heavy Cream
- 1 tsp. Vanilla Extract
- 1 cup Lakanto Baking Sweetner or Allulose
- For the Custard Filling:
- 2 Eggs
- 2 Egg Yolks
- 2 Cups Heavy Cream
- 1/2 cup Allulose
- Pinch Sea Salt
- For The Chocolate Ganache:
- 1/2 cup Lily’s Milk Chocolate Chips
- 2 Tbsp. Lakanto Baking Sweetener
- 1/4 cup Heavy Cream
Almond flour supplies a tender, rich crumb; coconut flour absorbs moisture and helps the cake hold together. They aren’t interchangeable. Whole eggs and extra whites provide structure as the baking powder lifts the batter, while butter keeps the cake moist.
In the filling, whole eggs set the cream and extra yolks add richness. Baking creates the thickened custard; blending afterward smooths that set texture into a spreadable filling without starch.
Allulose suits chilled custard because it is less prone to the gritty recrystallization associated with erythritol. Monk fruit blends vary, so check whether erythritol is the main ingredient. A finely powdered baking sweetener helps the ganache feel smoother, although powdering doesn’t eliminate every possibility of crystallization.
The measured vanilla belongs to the cake. Vanilla extract or vanilla bean paste is an optional custard flavor enhancement, not a required ingredient. For a cake mix alternative, see the shortcut section below.
How to Make Keto Boston Cream Pie Step-by-Step
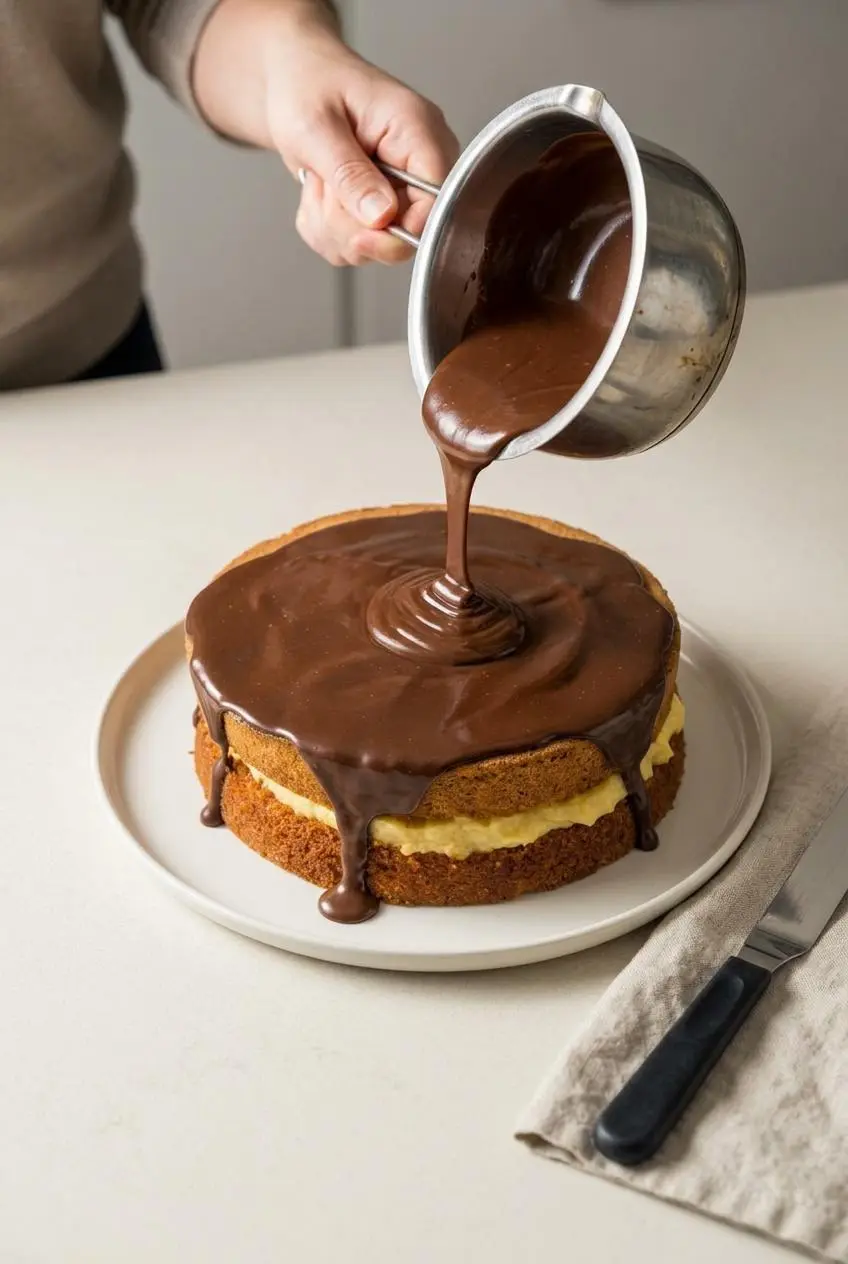
Make the cake and custard first, then assemble and chill before preparing the chocolate topping. This recipe serves 8; allow additional time for complete cooling and the chilling stages.
For the two-pan approach below, use the cooled cakes as your two layers without splitting them again. A single, deeper cake can instead be split horizontally once completely cool, but its baking time will differ; the listed baking time applies to the two-pan approach. Round-pan diameter isn’t specified, so watch the center closely.
- Set the oven to 350°F and grease two round cake pans, adding parchment circles to the bottoms if desired.
Parchment helps the delicate crumb release without leaving patches behind. - Beat the melted butter, whole eggs, egg whites, almond milk or cream, and vanilla together, then combine the flours, baking powder, salt, and cake sweetener separately before mixing them into the wet mixture.
The finished batter should look cohesive, with no dry flour pockets. - Divide the batter between the prepared pans and bake for about 20–24 minutes, checking the centers with a toothpick.
A clean toothpick signals that the cake is ready to leave the oven. - Leave the cakes in their pans until completely cool before turning them out.
The pans should no longer feel warm underneath, and the crumb should hold together during handling. - Beat the custard eggs, yolks, cream, allulose, and salt together, transfer to a greased 9×9-inch pan, and bake at 350°F for 30–40 minutes.
Look for a mostly set filling with a slight central jiggle and the first golden color on top. - Allow the baked custard to cool completely, then transfer it to a blender and process until uniform.
It should become silky and spreadable rather than remain in firm baked pieces. - Place one cooled cake layer on a serving plate, spread the custard evenly over it, gently position the second layer, and refrigerate for 1 hour.
The filling should firm up enough to support the upper layer without shifting. - After the filled cake has chilled, gently melt the chocolate chips, ganache sweetener, and heavy cream together in a double boiler while stirring.
Stop heating when the mixture looks glossy and evenly combined, with no unmelted chocolate. - Take the ganache off the heat, wait 2–3 minutes, and spread it across the chilled cake.
The topping should flow in a thick ribbon rather than run like hot cream. - Refrigerate the glazed cake for at least 10 minutes before cutting.
The chocolate surface should begin to set instead of flowing under the knife.
Expert Tips and Troubleshooting for Perfect Layers
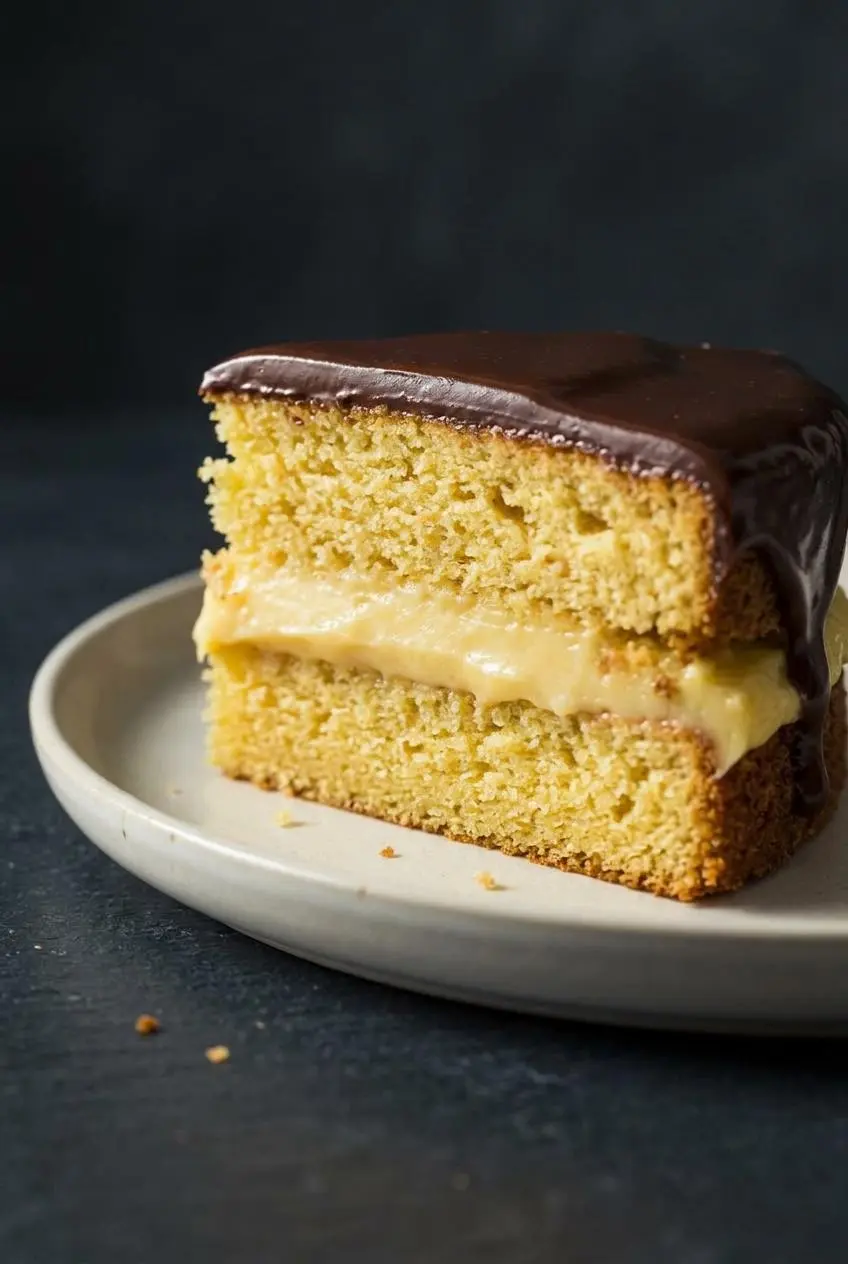
Most layer problems come from handling a component before it has cooled or set.
- Cake sticks or breaks: Warm grain-free cake is fragile. Use parchment circles and let the pans cool completely before loosening the edges and unmolding.
- Custard seems loose: Blending while warm won’t give a reliable picture of its final thickness. Cool it completely first, and check during baking that it is mostly set rather than liquid in the center.
- Filling squeezes out: Pressing down on the top cake forces custard toward the edges. Lower the layer gently, leave it unpressed, and complete the chilling stage before glazing.
- Ganache becomes too thick: Cooling can make it difficult to spread. Return it gently to the double boiler and stir just until it flows again.
- Ganache looks oily or separated: Excess heat can disrupt the mixture. Remove it from the heat and stir gently as it cools; avoid prolonged heating.
I’d judge ganache by how it falls from the spoon: a glossy ribbon is more useful than warmth alone.
If a cake layer breaks beyond neat stacking, a layered keto trifle offers a forgiving, spoonable presentation instead.
Recipe Variations and Shortcut Options
Keep these optional changes separate from the scratch cake measurements and method.
Keto Yellow Cake Mix Shortcut
A store-bought keto yellow cake mix lets you concentrate on the homemade custard and ganache. Follow its package directions for ingredients, pan choice, and baking rather than applying the scratch cake timing to a different batter.
Vanilla Bean Pastry Cream Upgrade
Optional vanilla bean paste or scraped vanilla seeds adds a fuller vanilla aroma and tiny specks throughout the custard. Vanilla extract offers the same flavor direction without the speckled appearance; none is required for the filling to thicken.
Keto Boston Cream Donuts and Mini Bites
The custard-and-chocolate combination also suits handheld desserts. These formats need their own suitable cake or pastry recipe:
- Donuts: Pair a fillable keto donut with custard and a chocolate top.
- Cupcakes: Use a sturdy keto cupcake to hold a custard center beneath the ganache.
- Mini bites: Small pastry shells, such as keto cream puffs, offer an individual-portion alternative.
Make-Ahead, Storage, and Serving Tips
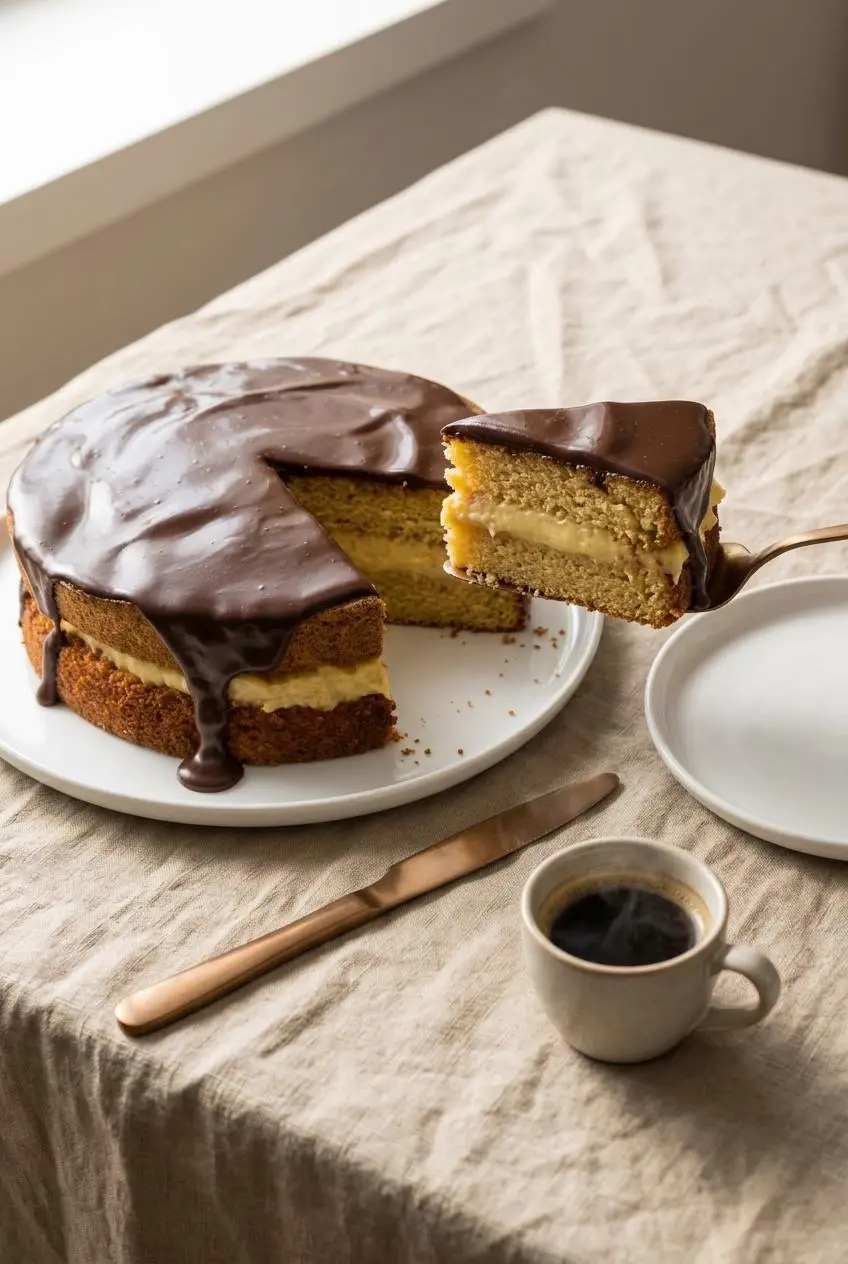
Organize preparation around the cooling and chilling stages rather than rushing straight from oven to assembly. Let the cake and custard cool completely, chill the filled layers, then make the ganache. The refrigerated pauses help the filling and topping firm for slicing.
Keep the assembled dessert covered and refrigerated. Use a tall cake carrier or a cover that clears the chocolate surface so it doesn’t pull away the topping. Return leftover slices to a covered container in the refrigerator rather than leaving the custard cake on the table.
Cut with a warm knife wiped dry, cleaning it between slices. Use gentle strokes instead of pressing hard through the layers. Serve chilled with hot coffee or espresso; homemade keto coffee creamer is an optional addition to the coffee.
Final Thoughts
Moist yellow cake, smooth blended custard, and glossy chocolate give this dessert its classic layered appeal. Baking the custard before blending makes the filling approachable without stovetop tempering.
Give every component its cooling time, and let the filled cake firm before glazing. Patient chilling makes that first clean slice much easier.
Frequently Asked Questions
Why Is Boston Cream Pie Called a Pie Instead of a Cake?
“Boston cream pie” is the traditional name, although the dessert has cake layers rather than a pie crust. This version follows that cake, custard, and chocolate format.
Can I Make This Keto Boston Cream Pie the Day Before Serving?
The assembly suits staged preparation because it requires cooling and refrigerated setting. A specific advance storage window isn’t established here; keep the finished cake covered and chilled rather than treating the setting time as a shelf-life guide.
Which Keto Sweetener Works Best to Prevent a Grainy Custard and Ganache?
Use the listed allulose for the custard to favor a smooth chilled texture. For ganache, a finely powdered baking sweetener helps avoid coarse particles; erythritol-based blends may still recrystallize.
Can I Swap the Almond Flour and Coconut Flour Ratios in the Cake?
No direct swap is recommended because coconut flour absorbs moisture differently from almond flour. Keep the listed proportions to preserve the intended moisture and structure.
How Do I Stop the Custard Layer From Sliding When Slicing the Cake?
Cool the custard completely before blending, then chill the filled cake before adding slightly cooled ganache. Complete the final chilling stage and cut gently with a warm, wiped knife.
Keto Boston Cream Pie

Equipment
- Round cake pans
- 9×9-inch baking pan
- Blender
- Double boiler
Ingredients
For The Cake (see notes for mix alternatives)
- 1.5 cups Almond Flour
- 1/4 cup Coconut Flour
- 3 tsp. Baking Powder
- 1/4 tsp. Sea Salt
- 1.5 sticks (3/4 cup) butter melted
- 4 Eggs
- 2 Egg Whites
- 1/2 cup Almond Milk OR Heavy Cream
- 1 tsp. Vanilla Extract
- 1 cup Lakanto Baking Sweetner or Allulose
For the Custard Filling:
- 2 Eggs
- 2 Egg Yolks
- 2 Cups Heavy Cream
- 1/2 cup Allulose
- Pinch Sea Salt
For The Chocolate Ganache:
- 1/2 cup Lily’s Milk Chocolate Chips
- 2 Tbsp. Lakanto Baking Sweetener
- 1/4 cup Heavy Cream
Instructions
- Set the oven to 350°F and grease two round cake pans, adding parchment circles to the bottoms if desired. Parchment helps the delicate crumb release without leaving patches behind.
- Beat the melted butter, whole eggs, egg whites, almond milk or cream, and vanilla together, then combine the flours, baking powder, salt, and cake sweetener separately before mixing them into the wet mixture. The finished batter should look cohesive, with no dry flour pockets.
- Divide the batter between the prepared pans and bake for about 20–24 minutes, checking the centers with a toothpick. A clean toothpick signals that the cake is ready to leave the oven.
- Leave the cakes in their pans until completely cool before turning them out. The pans should no longer feel warm underneath, and the crumb should hold together during handling.
- Beat the custard eggs, yolks, cream, allulose, and salt together, transfer to a greased 9×9-inch pan, and bake at 350°F for 30–40 minutes. Look for a mostly set filling with a slight central jiggle and the first golden color on top.
- Allow the baked custard to cool completely, then transfer it to a blender and process until uniform. It should become silky and spreadable rather than remain in firm baked pieces.
- Place one cooled cake layer on a serving plate, spread the custard evenly over it, gently position the second layer, and refrigerate for 1 hour. The filling should firm up enough to support the upper layer without shifting.
- After the filled cake has chilled, gently melt the chocolate chips, ganache sweetener, and heavy cream together in a double boiler while stirring. Stop heating when the mixture looks glossy and evenly combined, with no unmelted chocolate.
- Take the ganache off the heat, wait 2–3 minutes, and spread it across the chilled cake. The topping should flow in a thick ribbon rather than run like hot cream.
- Refrigerate the glazed cake for at least 10 minutes before cutting. The chocolate surface should begin to set instead of flowing under the knife.