Skip to content

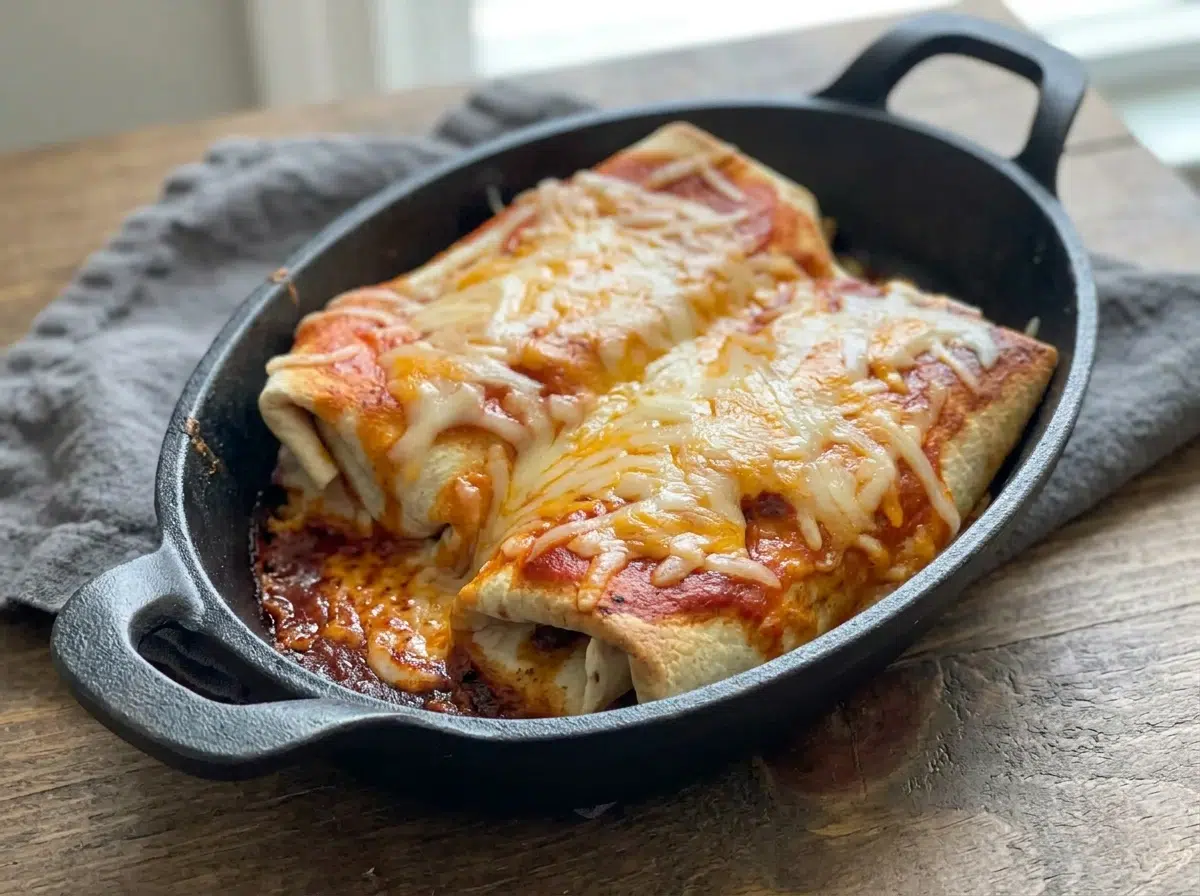
Keto chimichangas wrap cooked taco-seasoned beef, salsa, and cheese in low-carb tortillas, then crisp in a skillet before an enchilada sauce and cheese finish in the oven. Start seam-side down to help the folds hold together while the shells turn golden.
These keto chimichangas bring together a browned tortilla shell and a savory, melty filling. They’re a Tex-Mex dinner built around cooked ground beef, with a skillet-to-oven method that gives you both crisp edges and a cheesy topping.
The trick is balancing moisture with crunch: keep salsa inside the folds and avoid drowning the browned shells. That first snug tuck makes a difference.
Leave the tortilla’s side borders clear so you can fold them inward without pushing filling into the seams.
Ingredients You Need
Tortillas provide structure, seasoned beef brings savory flavor, and salsa adds moisture and acidity. Cheese supplies richness, cooking fat encourages browning, and red enchilada sauce gives the finished chimichangas a tangy, chile-forward topping.
- 6 low-carb tortillas
- 1 pound taco seasoned ground beef, cooked
- 3/4 cup salsa of choice
- 2 cups shredded cheese, divided (I used a Mexican blend cheese)
- 2 tablespoons butter or coconut oil
- 1 cup red enchilada sauce
Start with fully cooked, taco-seasoned beef. The cooking method below crisps the wrappers and melts the cheese; it isn’t a raw-meat cooking method. Choose pliable tortillas that bend without cracking.
Check taco seasoning, salsa, and enchilada sauce labels for added sugars and starch-based thickeners. Compare serving sizes, too, rather than relying on a low-carb claim on the front of the package.
How to Make Keto Chimichangas
The skillet develops the browned shell, while the oven melts the cheese topping. Use the measured amounts and timing below to keep the filling manageable.
Prep: 10 minutes. Cook: 15 minutes. Yield: 6 servings, one chimichanga each.
- Set the oven to 375°F before assembling the chimichangas.
Let it reach that setting so the cheese finish can melt without a prolonged wait in a warming oven. - Arrange 1/2 cup cooked taco-seasoned beef, 2 tablespoons salsa, and 2 tablespoons shredded cheese in a strip through the middle of each tortilla, then tuck the sides inward and roll snugly.
The finished bundles should have closed ends and a folded flap underneath, with no filling spilling through the edges. - Heat the butter or coconut oil in a skillet over medium heat, then brown the bundles in batches, allowing 30 to 60 seconds per side and starting with the seam underneath.
Look for lightly crisp surfaces and golden-brown patches rather than dark, scorched spots. - Arrange the browned chimichangas in an oven-safe pan or baking dish, spoon 2 to 3 tablespoons red enchilada sauce over each, and distribute the remaining shredded cheese on top.
The sauce should sit mainly across the tops, with cheese covering the sauced portions. - Bake for about 8 to 10 minutes, then serve warm with one chimichanga per portion.
The topping is ready when the shredded cheese has melted into a soft, cohesive layer.
For an optional crunchier finish, warm the enchilada sauce separately and serve it alongside instead of spooning it over the shells before baking. Keep the cheese finish, then dip or add sauce as you eat.
Tips for Rolling and Keeping Chimichangas Crispy
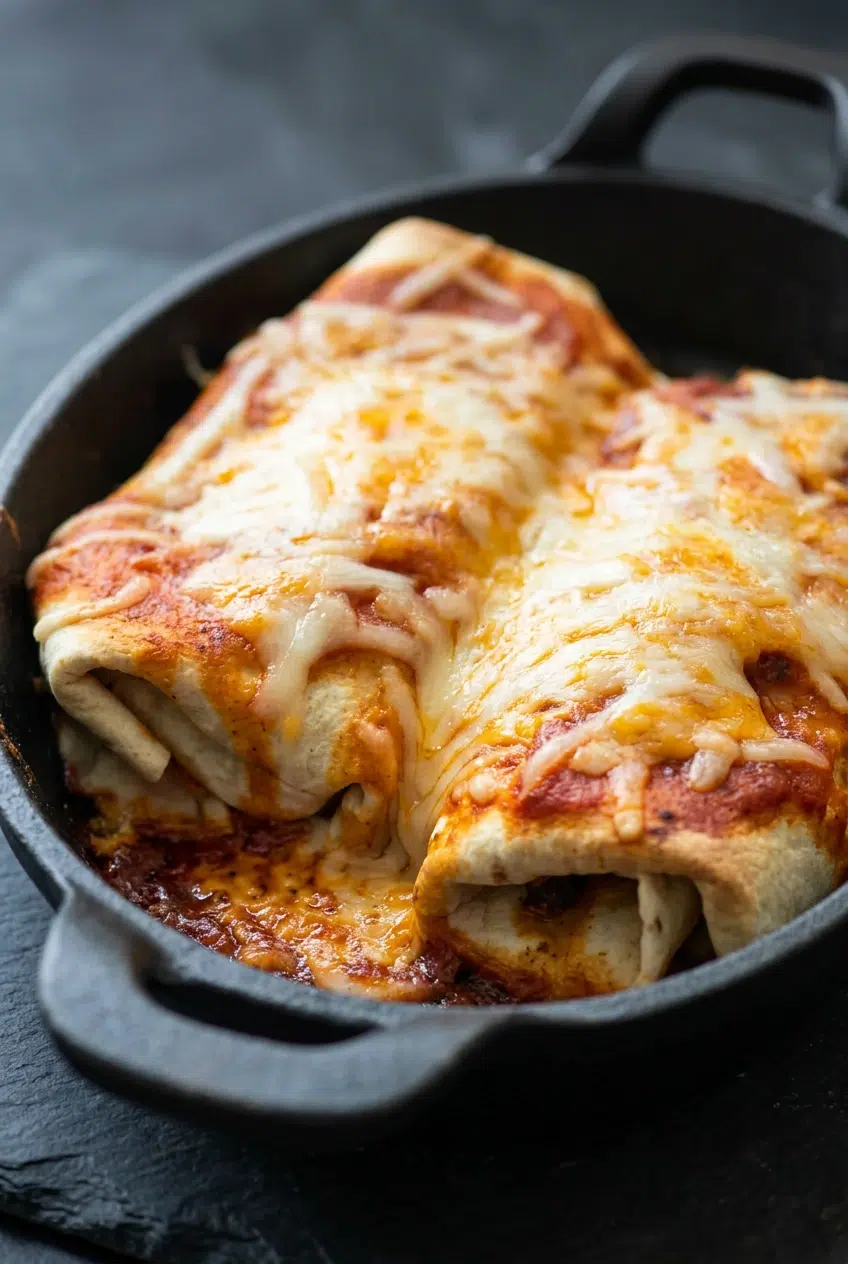
A tight fold matters more than squeezing extra filling into the wrapper. Use these fixes when the bundles resist rolling or brown unevenly.
- The tortilla splits: Filling pushed toward the edges leaves no room for folding. Keep it centered and bring the side flaps inward before rolling.
- The seam opens: A loose bottom flap can lift when turned. Begin seam-side down and let that surface brown before moving the chimichanga.
- The shell turns soggy: Thin salsa can leak into the folds. Avoid pooling watery salsa near the edges, and keep extra wet toppings for serving.
- The outside scorches: Excessive heat darkens low-carb tortillas quickly. Maintain medium heat and look for a gentle sizzle, not smoking fat.
- Browning looks patchy: Crowding makes turning awkward. Cook in batches with enough space to reach each bundle without crushing its neighbors.
I’d choose a flexible tortilla over a stiff one here; a wrapper that bends comfortably is much easier to tuck without tearing.
Popular Cooking Methods and Protein Variations
Keep these optional adaptations separate from the beef method above. Different wrappers and fillings can change how quickly the surface browns.
- Shredded beef: Cooked, taco-seasoned shredded beef gives the filling a more substantial, strand-like texture than ground beef.
- Oven-baked chimichangas: A lightly oiled wrapper offers a skillet-free direction, though the surface may brown differently from a pan-fried shell.
- Skillet-to-oven chimichangas: The method above gives you direct control over browning before the sauced cheese finish.
Shredded Chicken Keto Chimichangas
Cooked shredded chicken thighs make a savory alternative to beef. For a richer filling, pair the chicken with softened cream cheese, taco seasoning, and shredded cheese.
Another option is cooked shredded chicken with a tomato sauce, aromatics, and spices. Keep either filling cohesive rather than soupy so it stays inside the folded tortilla.
Air-Fryer Keto Chimichangas
An air fryer offers another crisping option with a light coating of oil on the wrapper. Leave room around the bundles for air circulation, and watch the tortilla’s color closely. Appliance performance and wrap thickness vary, so don’t transfer the skillet timing directly to this method.
Keto Wrap Choices and Ingredient Considerations
Choose a wrap by both its label and its handling qualities. “Low-carb” products aren’t interchangeable, and the finished meal’s fit depends on the ingredients, portions, and eating plan you follow.
Mexican-inspired meals don’t have to depend on a particular wrapper. If you’d rather skip tortillas, keto taco cups offer another way to enjoy taco-seasoned beef and cheese.
Low-Carb Tortillas vs. Egg-White Wraps
Pliable wheat-based low-carb tortillas give you a flour-tortilla-style fold and a substantial shell. Egg-white wraps have a thinner, more delicate texture and won’t produce an identical crust.
Compare ingredient lists and nutrition labels on the actual packages. Don’t assume a low-carb wheat tortilla is wheat-free or that every egg-white wrap has the same formulation.
Egg-White Wrap (Wheat-Free) Chimichangas
For an optional wheat-free direction, choose an egg-white wrap specifically labeled to match that preference. Handle it gently and avoid stretching it tightly around bulky filling. Expect a lighter wrapper rather than the same sturdy bite as a flour-style tortilla.
Make-Ahead Prep, Storage, and Reheating
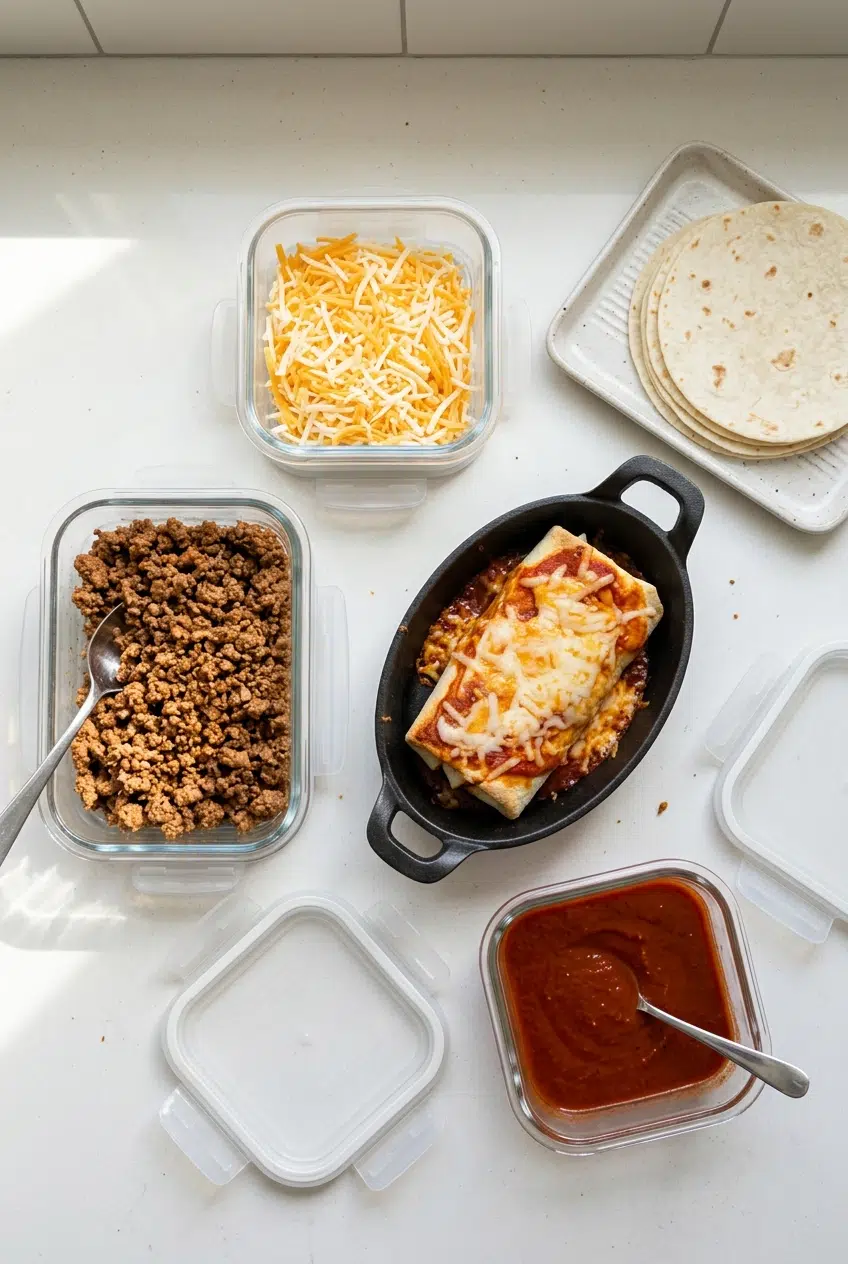
Keep components separate when organizing this meal ahead: refrigerate cooked filling in a covered container and leave the tortillas unfilled until you’re ready to crisp them. This helps avoid both damp seams and dried-out wraps.
Keep cooked leftovers covered and refrigerated, with extra sauce and fresh garnishes stored separately. For texture, choose oven or air-fryer reheating over microwaving, which tends to soften the wrapper. Heat the filling thoroughly rather than judging readiness by a crisp exterior alone.
Best Low-Carb Toppings and Serving Ideas
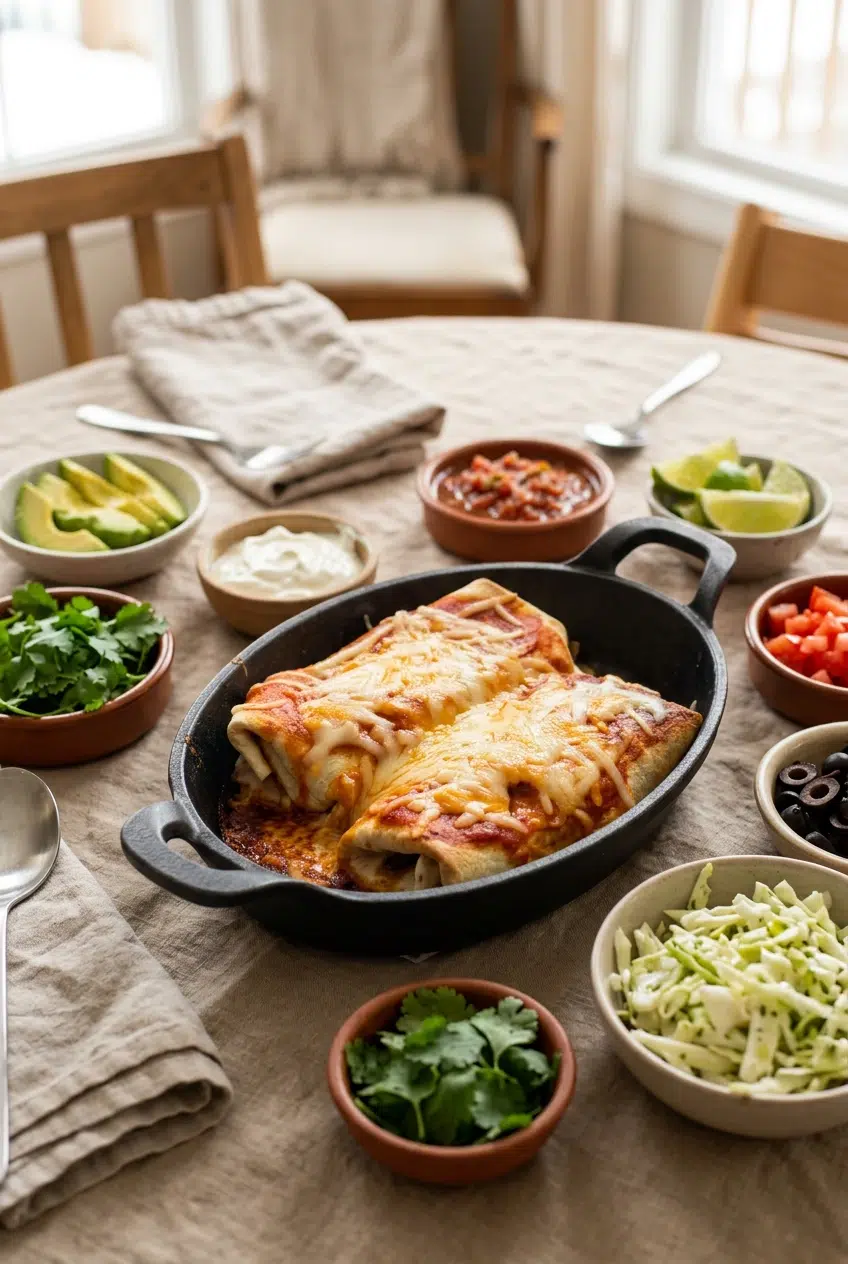
Add fresh toppings at the table so the browned shell doesn’t sit underneath wet garnishes.
- Creamy: Sliced avocado, guacamole, or sour cream balances the seasoned beef.
- Bright: Fresh cilantro, lime wedges, salsa, and diced tomatoes add acidity and freshness.
- Briny: Sliced black olives bring a savory contrast to the cheese.
- Crunchy: Crisp lime-dressed cabbage slaw makes a refreshing side.
For a creamy dessert after the savory meal, consider keto flan.
Final Thoughts on Homemade Chimichangas
A golden shell and melty filling come down to manageable filling portions, snug folds, and controlled skillet heat. Let the seam brown first so the bundle holds together when turned.
Start with the measured beef version, then explore different proteins or wrappers if you like. Keep extra sauce alongside when crunch is the priority.
Frequently Asked Questions
What Kind of Tortillas or Wraps Work Best for Keto Chimichangas?
Pliable low-carb tortillas are the easiest choice for a flour-tortilla-style fold and shell. Egg-white wraps offer a more delicate alternative; check the package for your ingredient and nutrition preferences.
How Do You Keep a Chimichanga Closed While Pan-Frying?
Center the filling, fold both sides inward, and roll snugly without stretching the tortilla. Place the seam underneath first and let it brown before turning.
Can You Air Fry or Bake Keto Chimichangas Instead of Pan-Frying?
Yes, both are optional alternatives with a light coating of oil for browning. Watch the wrapper closely rather than using the skillet timing for a different appliance.
Can I Use Shredded Chicken Instead of Ground Beef?
Yes, use cooked shredded chicken with taco seasoning. For a richer variation, include softened cream cheese as described above, keeping the filling cohesive.
How Do You Store and Reheat Keto Chimichangas Without Making Them Soggy?
Keep leftovers covered and chilled, with extra sauce and fresh toppings separate. Use an oven or air fryer to help restore the shell’s texture, and heat the filling thoroughly.
Keto Chimichangas

Equipment
- Skillet
- Baking dish
Ingredients
- 6 low-carb tortillas
- 1 pound taco seasoned ground beef cooked
- 3/4 cup salsa of choice
- 2 cups shredded cheese divided (I used a Mexican blend cheese)
- 2 tablespoons butter or coconut oil
- 1 cup red enchilada sauce
Instructions
- Set the oven to 375°F before assembling the chimichangas. Let it reach that setting so the cheese finish can melt without a prolonged wait in a warming oven.
- Arrange 1/2 cup cooked taco-seasoned beef, 2 tablespoons salsa, and 2 tablespoons shredded cheese in a strip through the middle of each tortilla, then tuck the sides inward and roll snugly. The finished bundles should have closed ends and a folded flap underneath, with no filling spilling through the edges.
- Heat the butter or coconut oil in a skillet over medium heat, then brown the bundles in batches, allowing 30 to 60 seconds per side and starting with the seam underneath. Look for lightly crisp surfaces and golden-brown patches rather than dark, scorched spots.
- Arrange the browned chimichangas in an oven-safe pan or baking dish, spoon 2 to 3 tablespoons red enchilada sauce over each, and distribute the remaining shredded cheese on top. The sauce should sit mainly across the tops, with cheese covering the sauced portions.
- Bake for about 8 to 10 minutes, then serve warm with one chimichanga per portion. The topping is ready when the shredded cheese has melted into a soft, cohesive layer.