
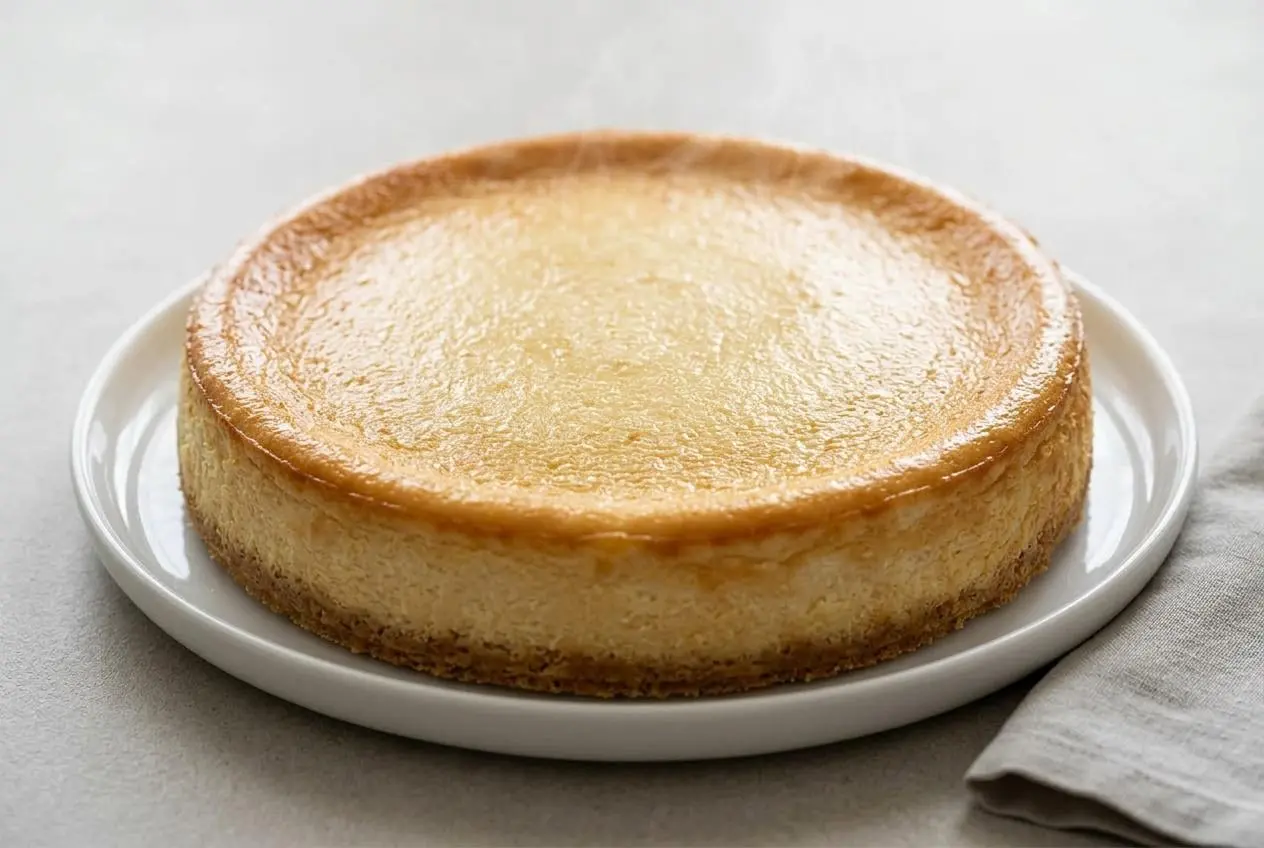
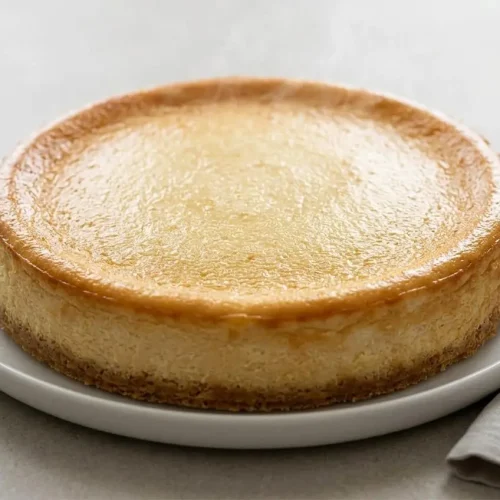
This keto cheesecake recipe makes a rich, creamy, tangy dessert with a buttery almond flour crust and a smooth filling that sets beautifully without a water bath.
If you want a true cheesecake texture on a low-carb dessert plan, this is the one to make. It bakes up luscious and sliceable, with that classic balance of sweet cream cheese and gentle tang.
What makes it especially reliable is the method. A few small choices, like room temperature ingredients and slow cooling, do most of the heavy lifting for you.
Set the cream cheese, sour cream, and eggs out ahead of time so the filling blends smooth instead of fighting you.
Ingredients
Each ingredient plays a real job here, from the toasty crust and warm cinnamon aroma to the creamy structure and tangy balance in the filling.
For the crust
- 1 1/2 Cups almond flour
- 1/4 Cup Powdered Sweetener
- 1 teaspoon Cinnamon
- 6 Tablespoons Butter, melted
For the filling
- 48 ounces full fat cream cheese, (room temperature)
- 2 Cups Powdered Sweetener
- 5 Large Eggs (room temperature)
- 8 Ounces Sour Cream (room temperature)
- 1 Tablespoon Vanilla extract
Full-fat cream cheese gives this cheesecake its rich body and classic dense-creamy bite. Sour cream loosens the filling just enough and adds a slight tang that keeps the sweetness in balance. Room temperature eggs help the batter emulsify smoothly, which means fewer lumps and a better chance of a clean top.
I always let the cream cheese soften fully before mixing because even one chilly block can leave tiny lumps that never quite disappear.
How to Make Keto Cheesecake
- Heat the oven to 325 °F and place a rack in the middle, then stir the almond flour, powdered sweetener, and cinnamon together before mixing in the melted butter.
The crust mixture should feel evenly moistened and sandy, with no dry pockets hiding in the bowl. - Press the crust mixture into a 10-inch springform pan, bringing it about halfway up the sides with your fingers and flattening the bottom with a flat-bottomed cup, then bake for 5 to 8 minutes.
It is ready when the crust smells lightly nutty and looks just a touch deeper in color. - Set the crust aside and beat the room temperature cream cheese in a large bowl with a hand mixer until it turns light and fluffy, or use the paddle on a stand mixer if that is what you have.
At this stage, the cream cheese should look completely smooth, like a thick Greek yogurt, with no visible lumps. - Add the powdered sweetener gradually, about one-third at a time, beating after each addition until the mixture stays smooth.
Scrape the bowl as needed so you do not end up with streaks of unmixed cream cheese later. - Mix in the room temperature eggs one at a time, blending each one in before adding the next.
Keep the batter smooth but do not whip it aggressively, because too much air can make the cheesecake rise and then crack. - Add the vanilla extract and room temperature sour cream, then mix only until the filling is combined.
The batter should look glossy, thick, and uniform, not foamy. - Pour the filling into the baked crust, smooth the top, and bake, checking after 50 minutes.
The cheesecake is done when the surface is no longer glossy, the edges are set, and the center still has a slight jiggle. - Turn the oven off, crack the door, and leave the cheesecake inside for 30 minutes, then remove it and run a sharp paring knife between the cake and pan without unlocking the springform.
This gentle cooling step helps the cheesecake settle instead of shrinking too fast and splitting on top. - Let the cheesecake stand on the counter for 1 hour, then cover loosely with plastic wrap or aluminum foil and refrigerate for at least 8 hours.
It might feel underdone at first, but trust the process because the center firms up fully as it chills. - Remove the springform sides, decorate the top if you like, and slice into 12 pieces to serve.
A clean, cold cheesecake will cut with neat edges and a dense, creamy center.
Tips for a Perfect, Crack-Free Keto Cheesecake
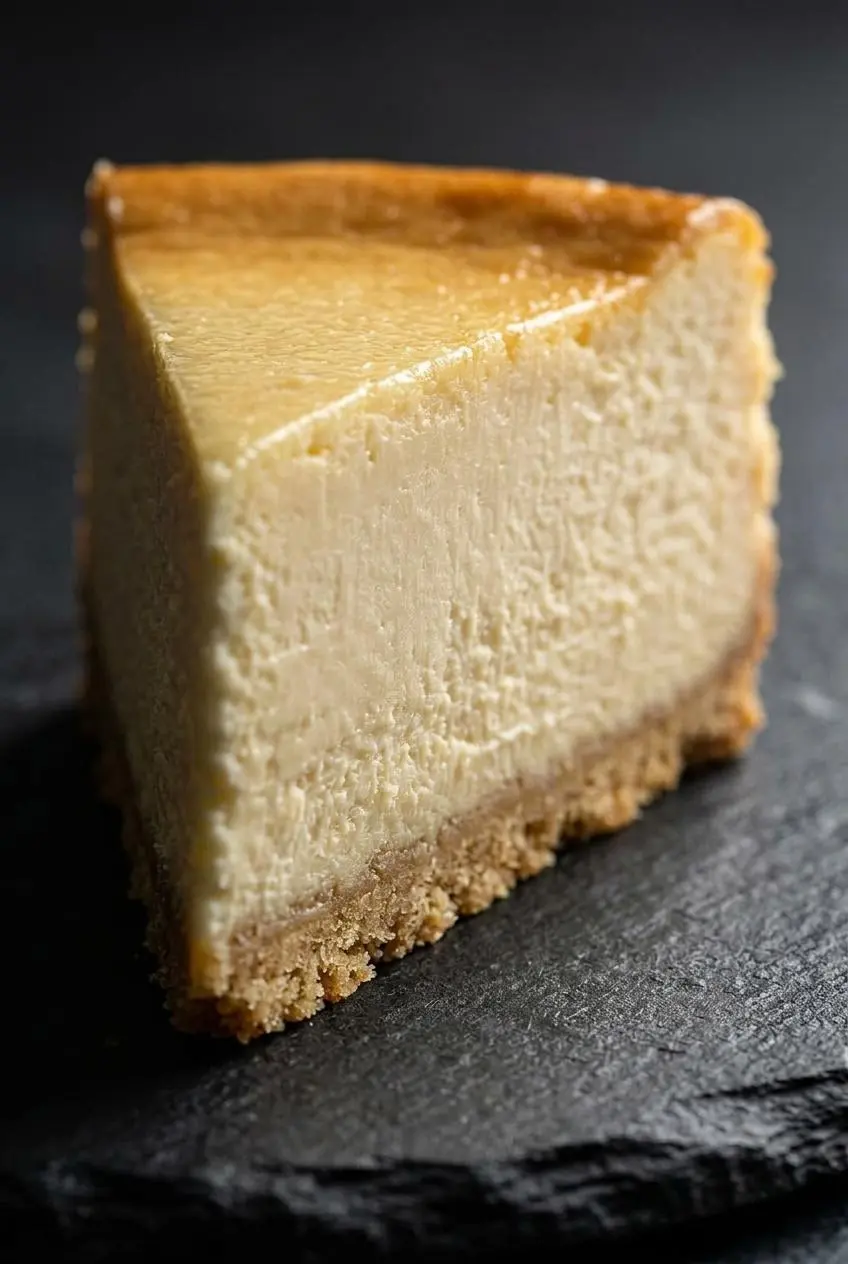
This is the section that saves a lot of frustration. Cheesecake is less about fancy technique and more about avoiding a few common mistakes that change the texture.
The Importance of Room Temperature Ingredients
Cold cream cheese does not blend well. It stays stubborn and pebbly, which leads to a lumpy batter and a less silky final texture.
When the cream cheese, eggs, and sour cream are at room temperature, they combine much more easily. That smooth batter traps less random air and bakes more evenly, which helps the cheesecake stay creamy instead of grainy.
If your dairy still feels cool in the center, give it more time. This one step matters more than people expect.
The Secret to a Smooth Filling
There are really two parts here. First, mix the cream cheese and sweetener until absolutely smooth. Then, once the eggs go in, shift to a lighter hand.
Eggs add structure, but they also bring the risk of overmixing. If you beat them too hard, you add extra air to the batter. That air makes the cheesecake puff in the oven, then sink and crack as it cools. So mix the eggs in well, but do not keep going just because the mixer is already in your hand.
If you want the smoothest possible filling, a food processor can help fully break down soft cream cheese. A hand mixer or stand mixer gives better control once the eggs are added. Either one works well if the batter stays smooth and not overly airy.
Some home bakers also strain cheesecake batter for an ultra-polished finish. It is optional here. If your batter is already completely smooth, you can skip that extra step without losing the creamy result.
How to Cool Your Cheesecake Perfectly
Most cracks happen after baking, not during it. The big culprit is a sudden temperature drop.
That is why this method has you turn off the oven, crack the door, and let the cheesecake sit there first. It continues the setting process gently. After that, the counter rest gives it more time to settle before the refrigerator takes over.
This is also why a water bath is not necessary for this recipe. The moderate oven temperature, careful mixing, and gradual cooling already do a lot to protect the texture and surface.
A few more problem-and-fix notes help here:
- If the cheesecake cracks, the likely cause is too much air, overbaking, or cooling too fast. The fix next time is gentler mixing, a jiggly center at doneness, and the full slow-cool process.
- If the texture turns grainy, the likely cause is cold cream cheese or granular sweetener. The fix is fully softened dairy and a powdered sweetener.
- If the crust softens, the likely cause is underbaking the crust or adding filling before it has settled slightly. The fix is baking until lightly fragrant and set before filling.
- If the cheesecake weeps a little moisture on top, the likely cause is overbaking. The fix is to pull it when the center still has that small wobble.
Choosing the Best Keto Sweetener
Sweetener choice changes more than sweetness. It affects texture, aftertaste, and even how the cheesecake looks once baked.
- Powdered erythritol blends: These are easy to find and work well in baked cheesecake, but the powdered form matters. Granular versions can leave a gritty texture, and some people notice a slight cooling sensation on the palate.
- Allulose: This gives one of the smoothest, most traditional cheesecake textures. It usually has no cooling effect and tends to brown a bit more naturally, though it can taste a little less sweet than sugar.
- Monk fruit blends: Many are blended with erythritol, so powdered versions are still the safer pick for a smooth filling. They are a solid all-around option when you want balanced sweetness without much fuss.
Powdered sweetener is the big takeaway. If your sweetener is granular, pulse it into a finer powder before mixing so the filling stays creamy rather than sandy.
If you are sensitive to sugar alcohols, it is worth choosing carefully and tasting your preferred sweetener in other desserts first. The right option depends on whether you care most about the cleanest texture, the least cooling aftertaste, or the most familiar sweetness.
Many home cooks wonder if a water bath method or a low-and-slow oven is better. For this cheesecake, the standard method is the most practical choice because it gives a great texture in less time. A lower, slower bake can be helpful if you enjoy a more cautious approach, but it takes longer. A water bath can add insulation, though it also adds setup and the risk of water sneaking into the pan if wrapped poorly.
Keto Cheesecake Variations
Once you know the main method, it is easy to change the format or flavor without losing the character of the cheesecake.
Crustless Keto Cheesecake
For a crustless version, skip the crust completely and grease the springform pan well before adding the filling. Because there is no crust layer to protect and support it, start checking a bit earlier since it may bake slightly faster.
You still want the same doneness cue at the center. The edges should be set, and the middle should wobble a little when nudged.
No-Bake Keto Cheesecake
If you want an oven-free option, treat it as a separate adaptation rather than a tweak to the baked method. Prepare the crust, then chill it instead of baking it.
For the filling, omit the eggs and beat in 1 cup of heavy cream until stiff peaks form, then spread the filling into the chilled crust and refrigerate until firm. The texture is lighter and mousse-like compared with the classic baked version, but still rich and satisfying.
Chocolate Swirl Cheesecake
For a chocolate swirl, melt 1/2 cup of keto chocolate chips, dollop the chocolate over the unbaked filling, and drag a knife through the top to marble it. You get little pockets of deeper flavor without changing the whole character of the cake.
If you want a brighter finish instead, add 1 tablespoon of lemon zest and 1/4 tsp salt to the filling. For a cozy seasonal twist, a little pumpkin puree with warm spices can take it in that direction, and if that flavor profile is your thing, keto pumpkin bread is another good one to keep in rotation.
Alternative Crust Ideas
You can swap the almond flour crust for finely ground pecan flour if you want a toastier, richer flavor. Walnut meal works in a similar way, though it tastes slightly earthier.
Coconut flour changes the texture more dramatically, so it is not a direct swap. For a nut-free direction, sunflower seed flour is the most natural fit and keeps the crust style closest to the original.
How to Store and Chill Keto Cheesecake
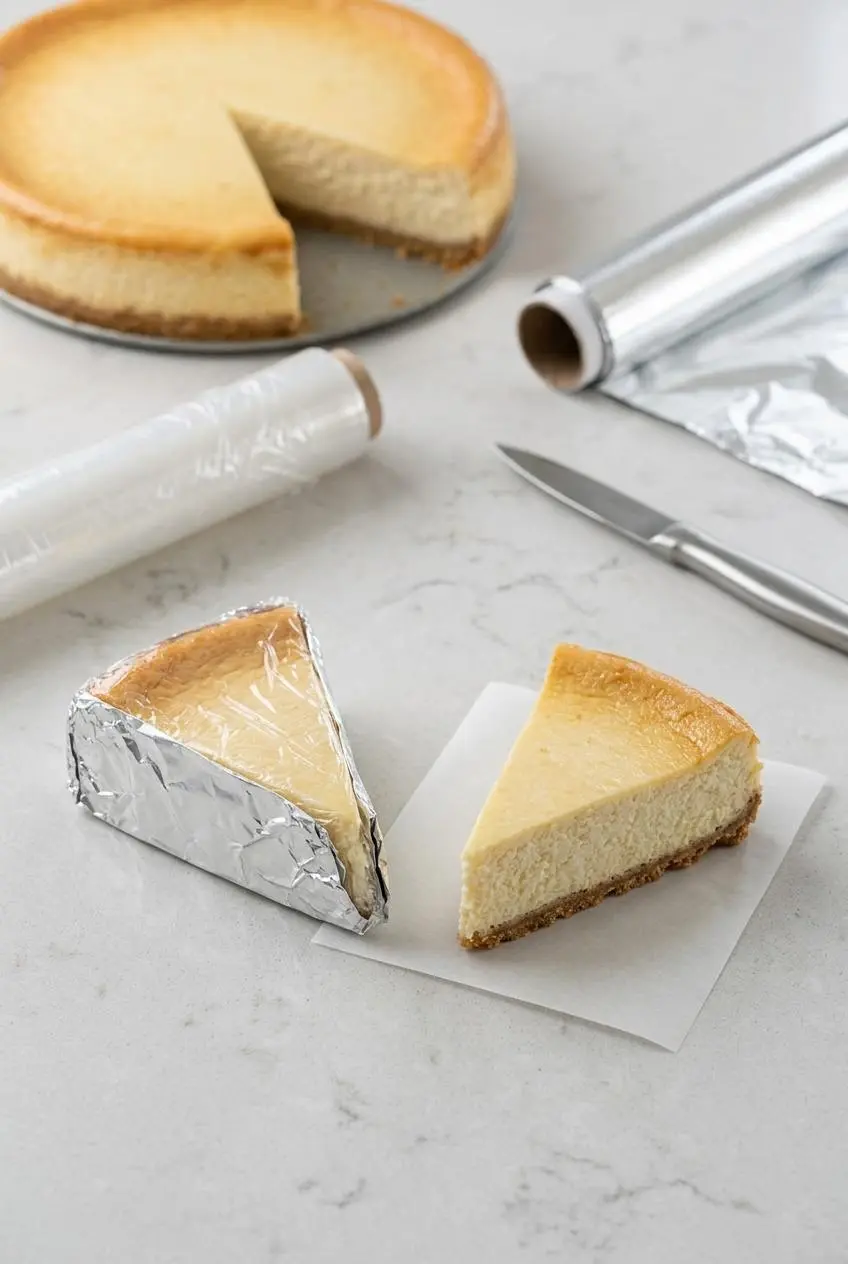
Cheesecake needs to stay refrigerated. Once cooled, keep it loosely covered or in a well-sealed container so it does not dry out or pick up refrigerator odors.
If you want to hold slices for later, chill them well and keep toppings separate until serving so the surface stays neat. Whipped cream, berry sauce, chocolate drizzle, or nuts are best added right before the plate goes out.
Because this cheesecake contains eggs and dairy, careful cold storage matters. For general safe handling of shell eggs and egg-based dishes, safe egg handling and storage is worth following in your kitchen routine.
Serving Suggestions
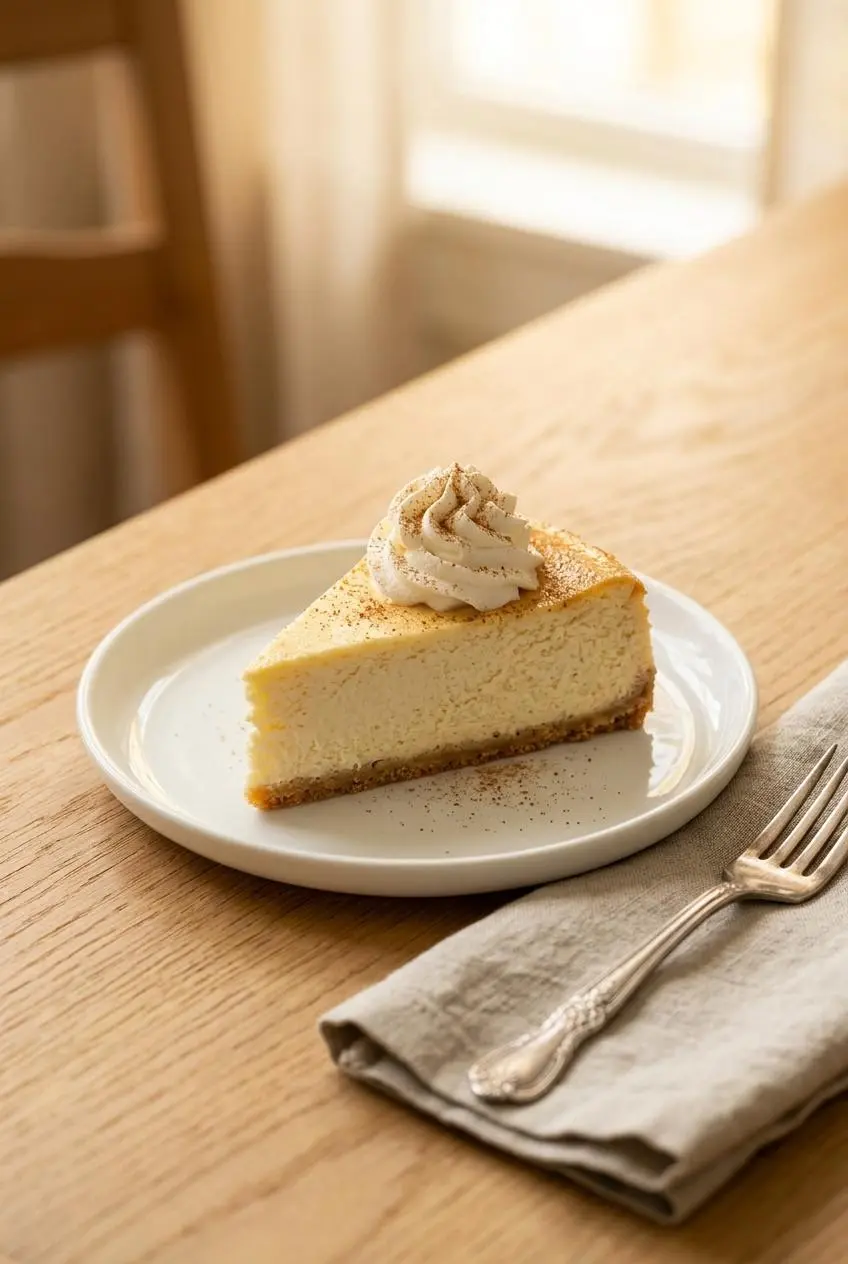
This cheesecake is rich, so a little contrast goes a long way.
- Top each slice with a dollop of sugar-free whipped cream and a light sprinkle of cinnamon for a classic finish.
- Drizzle with melted sugar-free dark chocolate or keto caramel sauce when you want a more dessert-table feel.
- Add toasted pecans or sliced almonds for crunch against the creamy center.
- Spoon over a fresh raspberry or strawberry sauce for a bright, tangy contrast.
If you are going full chocolate mood, serving this with a keto chocolate milkshake turns dessert into a real event.
Conclusion
This cheesecake gives you the classic rich, creamy result people want, without making the process feel fussy. The texture is luxurious, the almond flour crust adds buttery contrast, and the method is very doable at home.
Keep the ingredients at room temperature and cool the cheesecake slowly, and you are already most of the way to success. Once you slice into that smooth center, the patience makes perfect sense.
Frequently Asked Questions
Why is my keto cheesecake not setting?
It usually needs more chilling time. This cheesecake sets fully in the refrigerator, and the texture improves a lot after at least 8 hours of chilling. Check the bake cue too. The edges should be set when it comes out of the oven, while the center should still have a slight jiggle. If the middle was very liquid when you pulled it, it may simply have needed more oven time.
Can I make this cheesecake with a different nut flour for the crust?
Yes. Finely ground pecans or walnuts work well as a 1:1 substitute for almond flour. For a nut-free option, sunflower seed flour is the closest style swap. Coconut flour is trickier because it absorbs differently, so it is not the most direct replacement.
How can I fix a cracked keto cheesecake?
The easiest fix is cosmetic. Once the cheesecake is cold, cover the top with whipped cream, fresh berries, chocolate drizzle, or caramel sauce. The crack disappears fast under toppings, and the flavor is still great. For next time, focus on room temperature ingredients, gentle mixing after the eggs, and slow cooling.
What size springform pan is best for this recipe?
This recipe is designed for a 10-inch springform pan that is 3 inches deep. If you use a 9-inch pan, the cheesecake will be thicker and usually needs a longer bake. In that case, start checking for doneness about 10 to 15 minutes later and rely on the jiggly-center cue instead of the clock alone.
Keto Cheesecake Recipe

Equipment
- Springform Pan 10 inches (24cm) by 3 inches (8cm)
Ingredients
For the crust
- 1 1/2 Cups almond flour
- 1/4 Cup Powdered Sweetener
- 1 teaspoon Cinnamon
- 6 Tablespoons Butter, melted
For the filling
- 48 ounces full fat cream cheese, (room temperature)
- 2 Cups Powdered Sweetener
- 5 Large Eggs (room temperature)
- 8 Ounces Sour Cream (room temperature)
- 1 Tablespoon Vanilla extract
Instructions
- Heat the oven to 325 °F and place a rack in the middle, then stir the almond flour, powdered sweetener, and cinnamon together before mixing in the melted butter. The crust mixture should feel evenly moistened and sandy, with no dry pockets hiding in the bowl.
- Press the crust mixture into a 10-inch springform pan, bringing it about halfway up the sides with your fingers and flattening the bottom with a flat-bottomed cup, then bake for 5 to 8 minutes. It is ready when the crust smells lightly nutty and looks just a touch deeper in color.
- Set the crust aside and beat the room temperature cream cheese in a large bowl with a hand mixer until it turns light and fluffy, or use the paddle on a stand mixer if that is what you have. At this stage, the cream cheese should look completely smooth, like a thick Greek yogurt, with no visible lumps.
- Add the powdered sweetener gradually, about one-third at a time, beating after each addition until the mixture stays smooth. Scrape the bowl as needed so you do not end up with streaks of unmixed cream cheese later.
- Mix in the room temperature eggs one at a time, blending each one in before adding the next. Keep the batter smooth but do not whip it aggressively, because too much air can make the cheesecake rise and then crack.
- Add the vanilla extract and room temperature sour cream, then mix only until the filling is combined. The batter should look glossy, thick, and uniform, not foamy.
- Pour the filling into the baked crust, smooth the top, and bake, checking after 50 minutes. The cheesecake is done when the surface is no longer glossy, the edges are set, and the center still has a slight jiggle.
- Turn the oven off, crack the door, and leave the cheesecake inside for 30 minutes, then remove it and run a sharp paring knife between the cake and pan without unlocking the springform. This gentle cooling step helps the cheesecake settle instead of shrinking too fast and splitting on top.
- Let the cheesecake stand on the counter for 1 hour, then cover loosely with plastic wrap or aluminum foil and refrigerate for at least 8 hours. It might feel underdone at first, but trust the process because the center firms up fully as it chills.
- Remove the springform sides, decorate the top if you like, and slice into 12 pieces to serve. A clean, cold cheesecake will cut with neat edges and a dense, creamy center.


Made this last night and the texture was honestly spot on. I usually end up with tiny lumps in keto cheesecakes, but letting everything sit out first fixed that completely.
So good 😍
I followed the method pretty closely and mine still cracked a bit around the edges, even though the middle had a slight jiggle when I pulled it. Could my oven just run hot, or should I start checking earlier next time
Yes, an oven that runs a little hot can definitely do it. I would start checking a bit earlier next time and pull it as soon as the edges are set and the center still has that small wobble. Gentle mixing after the eggs and the slow cooling step also make a big difference.
I appreciate that this one skips the water bath. I tried a different keto cheesecake for my sister’s birthday a few months ago and wrapped the pan badly, so water leaked in and the crust turned into a sad paste. This version feels way more doable for normal people, and the note about powdered sweetener is super helpful because gritty filling is my biggest pet peeve.
Thank you, and yes, that is exactly why I like this method so much. Water baths can work, but they add a lot of fuss. Powdered sweetener and fully softened cream cheese really help keep the filling smooth here.
Quick question, have you tried this in a 9 inch springform pan with the same ingredient amounts? That is the only one I have and I do not mind a taller cheesecake, just not sure how much extra bake time it usually needs.
Yes, you can use a 9 inch pan with the same amounts. The cheesecake will be a bit taller, so plan on a longer bake and start checking around 10 to 15 minutes later. Go by the look more than the clock, set edges and a slight jiggle in the center.
This sounds so good. I like that it keeps the classic cheesecake texture without a water bath. The note about room temperature ingredients is really helpful because that is usually where I mess up.